Avoid These 7 Deadlift Mistakes At ALL Costs

Are you sabotaging your deadlift without even realizing it? In this video, Starting Strength Coach Phil Meggers breaks down 7 common mistakes that can wreck your progress and stall your strength gains. Fix these now—and lift smarter and stronger.

Whenever you want even more Testify in your life, here are some free resources:

  • Book a free intro and strategy session with us HERE.

  • Pick up a free copy of Testify’s Squat Guide: 12 Tips to Improve Your Squat Now HERE.

  • Get our free weekly email - containing useful videos, articles, and training tips - HERE.

  • Follow Testify on Instagram HERE.

  • Subscribe to Testify’s YouTube channel HERE.


At Testify, we offer small group training, private coaching (in-person or remotely via Zoom), online coaching, and form checks. Interested in getting stronger, looking better, and having more energy?

The Testify Patriot - July 28, 2025

THIS WEEK'S SUBMISSION

From our video 9 Brutal Truths About Lifting Weights That Seniors LEARN Too Late (click the title to watch):

FatFreddys Cat
Excellent vid! Very straight forward without fluff. At 61 I've recently started back up with it and feeling much better already.

Looking forward to continuing. Thanks much for your efforts in making this available. d:^)

Phil
You’re very welcome, and thanks for the kind words! Congratulations on starting back up, and I’m glad that you’re already feeling better!


TESTIFY ONLINE COACHING

Interested in getting stronger working one-on-one remotely with us? Click here to book your free strategy session.

Get Stronger. Live Better. Start Today.


ARTICLES & VIDEOS

8 Signs Your Press is WAY Above Average
These 8 signs separate average lifters from serious pressers. Do you make the cut? If not, let's fix your press fast. Click here to watch.


2 “Small” Changes That Unlock Big Squat Gains
Want to squat more weight? Of course you do. Phil explains how to do just that. Click here to read.


Blast from the Past: How to Squat: The Setup | STOP Doing This!
Is your lousy setup destroying your squat? In 2 minutes, we cover a common error during the setup process and help you fix it. Click here to watch.


Blast from the Past: DIY Lifting Platform - Easy and Fast!
Phil helps you quickly and easily build a lifting platform that is durable and protects your equipment and floor. Click here to read.


SLEEVES ARE OVERRATED - GRAB A TESTIFY TANK!

Sun's out, guns out, and we've got men's and women’s tank tops in multiple colors.

Get yours today and represent your favorite gym!

Click here to head to the Testify Store.


WHAT'S COMING UP

Below are a few of our upcoming events, and you can find out what else is on the calendar by heading to our events page at www.testifysc.com/events.

Deadapalooza! The Annual Testify Deadlift Festival

  • August 15, 2025

  • Deadapalooza is a strength meet wherein the only contested lift is - you guessed it - the deadlift. There will be one bar (possibly multiple bars if numbers dictate), and the meet will be conducted in a "rising bar" format, so the weight on the bar only goes up! It's a ton of fun, so come on out!

  • Click here to register or for more information.

Minneapolis, MN: Starting Strength Squat & Deadlift Camp

  • October 4, 2025

  • Spend the day learning the theory and practice of the low bar back squat and the deadlift.

  • Participants will spend lots of time on the platform receiving coaching and instruction on the squat and deadlift in a small group setting. We will also have a lecture and discussion on programming and cover how to identify and correct common technical problems.

  • Click here to register or for more information.

Benching Bonanza! The Annual Testify Bench Press Jubilee

  • November 21, 2025

  • Benching Bonanza is a strength meet wherein the only contested lift is - not surprisingly - the bench press. There will be one bar, and the meet will be conducted in a "rising bar" format, so the weight on the bar only goes up! It’s a great time for all involved, and we hope to see you there!

  • Click here to register or for more information.


THIS WEEK’S CONDITIONING

Option 1
Sled Pyramid – 4, 5, or 6 tiers
Go up and down a 4, 5, or 6 tier “sled pyramid” – rest as needed. The distance for each round is 80 m indoors (a down-back on the 40m course) or 200 ft outdoors (2 down-backs on the 50 ft course). Rest as needed.

For example, Bob does the following (4 tiers):
Round 1: Empty sled
Round 2: 25#
Round 3: 50#
Round 4: 75#
Round 5: 50#
Round 6: 25#
Round 7: Empty sled

Compare to 2025.06.23.

Option 2
Bike/row:
4 x 3 minutes

Rest 3 minutes between each round. Score = lowest distance.

Compare to 2025.05.05.

Option 3
Outdoors:
5-10 rounds:
10 sledgehammer strikes (5R, 5L)
50 yd farmer carry (25 yd down-back)
Rest 1 minute

Indoors:
5-10 rounds:
10 sledgehammer strikes (5R, 5L)
100 ft farmer carry (50 ft down-back)
Rest 1 minute

Compare to 2025.04.07.

Option 4
1. 5 yoke carries @ 30 yd (15 yd downback) – work up to heaviest carry
2. 5 rounds of 5 reps on the axle “clean and press away” – work up to heavy set of 5

Compare to 2025.04.07.


As always, we hope this helps you get stronger and live better!

Whenever you want even more Testify in your life, here are some free resources:

  • Book a free intro and strategy session with us HERE.

  • Pick up a free copy of Testify’s Squat Guide: 12 Tips to Improve Your Squat Now HERE.

  • Get our free weekly email - containing useful videos, articles, and training tips - HERE.

  • Follow Testify on Instagram HERE.

  • Subscribe to Testify’s YouTube channel HERE.

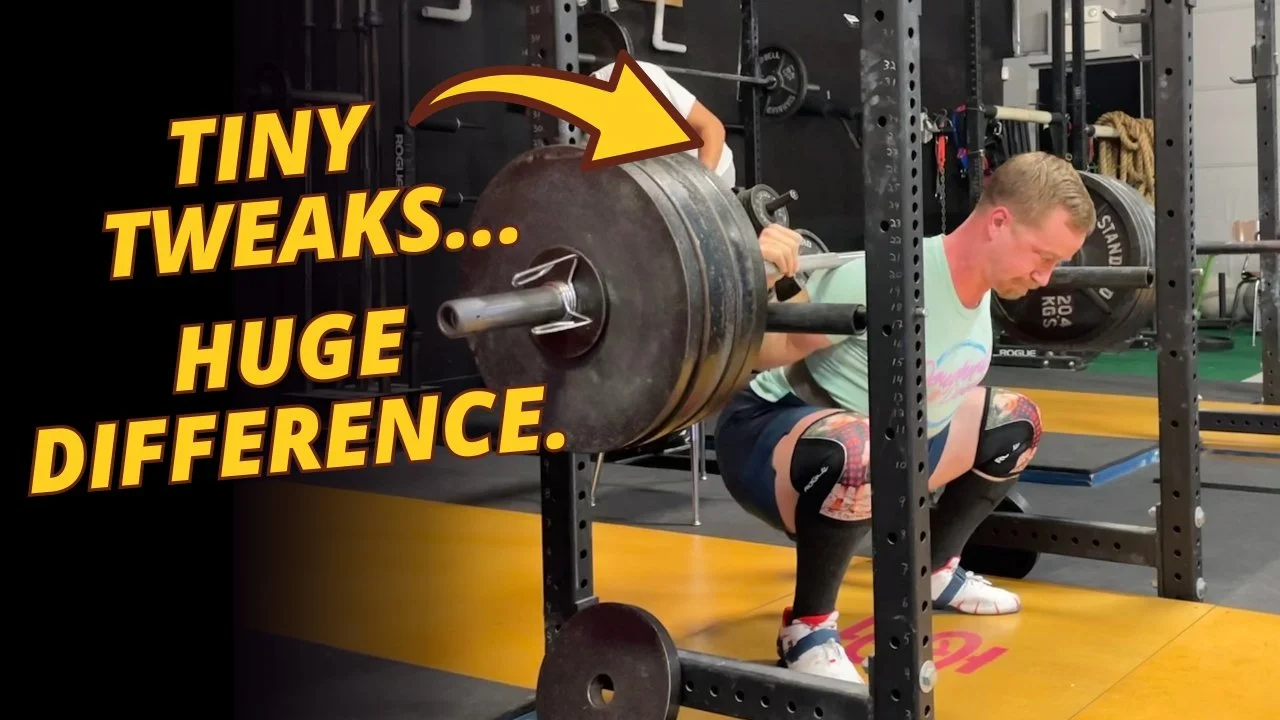
2 “Small” Changes That Unlock Big Squat Gains

The Scenario
You’re trying to squat using the Starting Strength method. You’re excited about the low bar squat.

You’ve read the book. You’ve watched the videos . . .

But you’re still struggling to execute the lift correctly.

Here are two simple cues that just might make all the difference.

figure 1: This fool is keeping his back angle too vertical as he starts his descent.

The Problem is Two-Fold
When lifters are having difficulties with the squat, the problem often consists of two factors - achieving the correct back angle on the way down and then maintaining that correct back angle on the way back up again.

In other words, the lifter usually is keeping his torso too vertical on the descent (Figure 1), and he isn’t correctly driving with his hips on the ascent.

Let’s fix this real quick-like.

Check out the video above if you want to see the solution in action.

The Solution: Option #1
On the descent, cue yourself, “Lead with the chest.”

You are reminding yourself to start pointing your chest at the floor right away as you start to descend (side note - you’ll need to reach backward with your hips to do this).

figure 2: becky correctly points her chest at the floor as she descends.

On the ascent, however, use the cue, “Lead with your hips.”

In other words, you are cueing yourself to drive your hips straight up out of the hole, and you are specifically not thinking about what your chest, shoulders, the barbell, or anything else is doing (don’t worry - they’ll go up, too).

So, to summarize, “lead with the chest” on the way down (Figure 2), and then “lead with the hips” on the way back up.

The Solution: Option #2
If you struggle with the concept of driving your hips upward on the ascent, use the cue “Keep your chest down” instead for this portion of the lift (Figure 3).

In this case, your cue for the descent is still “lead with the chest,” and your cue for the ascent is now “keep your chest down” (or equivalently, “stay leaned over”).

figure 3: tyler correctly keeps his chest pointed at the floor for a good portion of his ascent.

These solutions are quick, simple, and as always, we hope they help you get stronger and live better.

-Phil

PS: Whenever you want even more Testify in your life, here are some free resources:

  • Book a free intro and strategy session with us HERE.

  • Pick up a free copy of Testify’s Squat Guide: 12 Tips to Improve Your Squat Now HERE.

  • Get our free weekly email - containing useful videos, articles, and training tips - HERE.

  • Follow Testify on Instagram HERE.

  • Subscribe to Testify’s YouTube channel HERE.

(Some links may be affiliate links. As an Amazon Associate, Testify earns from qualifying purchases.)


At Testify, we offer small group training, private coaching (in-person or remotely via Zoom), online coaching, and form checks. Interested in getting stronger, looking better, and having more energy?

How to Squat: The Setup | STOP Doing This!

Is your lousy setup destroying your squat? In 2 minutes, Starting Strength Coach Phil Meggers covers a common error during the setup process and helps you fix it.

(A Blast from the Past video originally published on 01/02/23)

Whenever you want even more Testify in your life, here are some free resources:

  • Book a free intro and strategy session with us HERE.

  • Pick up a free copy of Testify’s Squat Guide: 12 Tips to Improve Your Squat Now HERE.

  • Get our free weekly email - containing useful videos, articles, and training tips - HERE.

  • Follow Testify on Instagram HERE.

  • Subscribe to Testify’s YouTube channel HERE.


At Testify, we offer small group training, private coaching (in-person or remotely via Zoom), online coaching, and form checks. Interested in getting stronger, looking better, and having more energy?

DIY Lifting Platform - Easy and Fast!

(A Blast from the Past article originally posted on 06/02/23)

Let’s build a lifting platform . . . fast. We’ve got the steps below, and be sure to watch the included videos to see the process in action.

Why You Should Have a Lifting Platform
You want a lifting platform for several reasons - first, it protects your equipment. Specifically, it protects your plates and the floor from chipping, cracking, and/or breaking due to deadlifting, cleaning, snatching, rowing, etc. Second, it’s great for noise and vibration dampening, which is important when you’re lifting while your 2-year-old is sleeping, and it’s also important so that you don’t annoy your neighbors. Finally, a platform is useful for safety - it clearly delineates your lifting space. When you’re on the platform, it says, “Hey, this is someone’s lifting space - stay off the platform.”

How to Build It
“Build” is an aggressive term. Putting together a platform is pretty simple - so much so that “assemble” is probably more appropriate. Here we go:

Step 1: Base Layer
Take two ¾” x 4’ x 8’ sheets of OSB and set them down on the floor side-by-side. These sheets run lengthwise, i.e., “front-to-back” in terms of your platform’s orientation (Figure 1).

Note: These sheets are commonly referred to as ¾” thick, but the actual thickness is 23/32” and will be listed that way at the lumber store.

IMPORTANT: Most sheets have a slight bow or “crown” to them. When setting them down, be sure that the crown is up. In other words, you want the sheet to make a hill, not a valley. If you do this, the weight of the entire platform itself helps remove any bowing from the final product.

Step 2: Middle Layer
Take two more ¾” x 4’ x 8’ sheets of OSB and set them on top of the base layer so that they run perpendicular to the base layer’s sheets, i.e., “side-to-side” in terms of your platform’s orientation (Figure 2). Attach the middle layer to the base layer using 1 ¼” screws - we use 3 screws along the short edge of each sheet and 4 screws along the long edge of each sheet.

Step 3: Top Layer - MDF
Take a ¾” thick sheet of MDF and cut it so that it’s 96” x 42” (i.e., 8’ x 3.5’). MDF comes in 97” x 49” sheets, and you can either have your lumber supplier do it for you (Lowe’s typically does this for free), or you can do it yourself. We like MDF as it’s relatively heavy, sits nice and flat, and because of this, it helps remove any bowing from your platform. With that said, you can also use something nicer like oak for the top layer.

Using 1 ⅝” screws, attach the MDF to the middle layer so that it’s perpendicular to that layer (i.e., the MDF will run “front-to-back”) and centered. The MDF should sit so that it’s 27” in from either side of the platform. We use 3 screws down each long edge for a total of 6 screws. Be sure that the screws are slightly countersunk so that you don’t damage your plates if you accidentally set the bar down a bit off-center.

Step 4: Top Layer - Horse Stall Mats
Get three ¾” x 4’ x 6’ rubber horse stall mats. Ideally, you want mats without any type of pattern or texture on them, but if they are dimpled on the bottom, it’s not the end of the world. Using a jig saw (watch the video), cut two 72” x 27” pieces (i.e., 6’ x 2’3”) and two 24” x 27” pieces (i.e., 2’ x 2’3”). Thus, you now have two long pieces and two short pieces of horse stall mat.

Set one long piece and one short piece on the left side of the MDF and repeat the process on the right side of the MDF (Figure 3). Make sure the rubber mats fit tight and snug up against the MDF as well as each other, then attach the mats to the middle layer using 1 ⅝” screws (Figure 4), and again, be sure to countersink them slightly. We put screws around the outside, front, and back edges of the mats. However, don’t put screws on the edge near the MDF - this will help ensure that you don’t accidentally set your plates down on a screw that’s a bit proud.

There you have it - your very own lifting platform. It’s easy, it’s quick, and it’s incredibly durable.

As always, we hope this helps you get stronger and live better.

-Phil

PS: Whenever you want even more Testify in your life, here are some free resources:

  • Book a free intro and strategy session with us HERE.

  • Pick up a free copy of Testify’s Squat Guide: 12 Tips to Improve Your Squat Now HERE.

  • Get our free weekly email - containing useful videos, articles, and training tips - HERE.

  • Follow Testify on Instagram HERE.

  • Subscribe to Testify’s YouTube channel HERE.

(Some links may be affiliate links. As an Amazon Associate, Testify earns from qualifying purchases.)


At Testify, we offer small group training, private coaching (in-person or remotely via Zoom), online coaching, and form checks. Interested in getting stronger, looking better, and having more energy?

8 Signs Your Press is WAY Above Average

These 8 signs separate average lifters from serious pressers. Do you make the cut? If not, let's fix your press fast. Starting Strength Coach Phil Meggers explains.

Whenever you want even more Testify in your life, here are some free resources:

  • Book a free intro and strategy session with us HERE.

  • Pick up a free copy of Testify’s Squat Guide: 12 Tips to Improve Your Squat Now HERE.

  • Get our free weekly email - containing useful videos, articles, and training tips - HERE.

  • Follow Testify on Instagram HERE.

  • Subscribe to Testify’s YouTube channel HERE.


At Testify, we offer small group training, private coaching (in-person or remotely via Zoom), online coaching, and form checks. Interested in getting stronger, looking better, and having more energy?